What is DNSSEC?
DNSSEC is simply DNS-Secured that uses DNS over TLS to encrypt your DNS requests. This option will prevent that other parties will able to view the contents of your DNS requests.
Update: Since 2022 I’ve switched over to Opnsense
How To
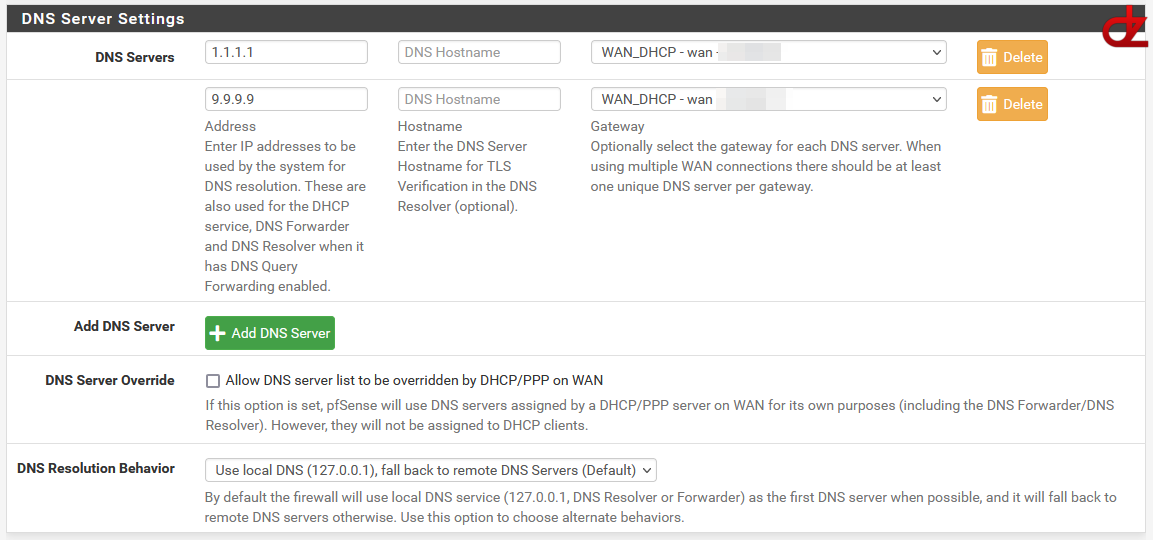
Configure your pfSense DNS servers:
- Go to System -> GeneralUnder the “DNS Server Settings”
- Enter a DNSSEC compatible DNS Server (e.g. 1.1.1.1 and 9.9.9.9)

Upload an SSL Certifcate
- Go to System -> Cert. Manager
- Under Certificates you can upload your own SSL cert (e.g. LetsEncrypt or a paid SSL cert)
- You can also use the ACME package for pfSense to create, manage and auto renew L3 certs!
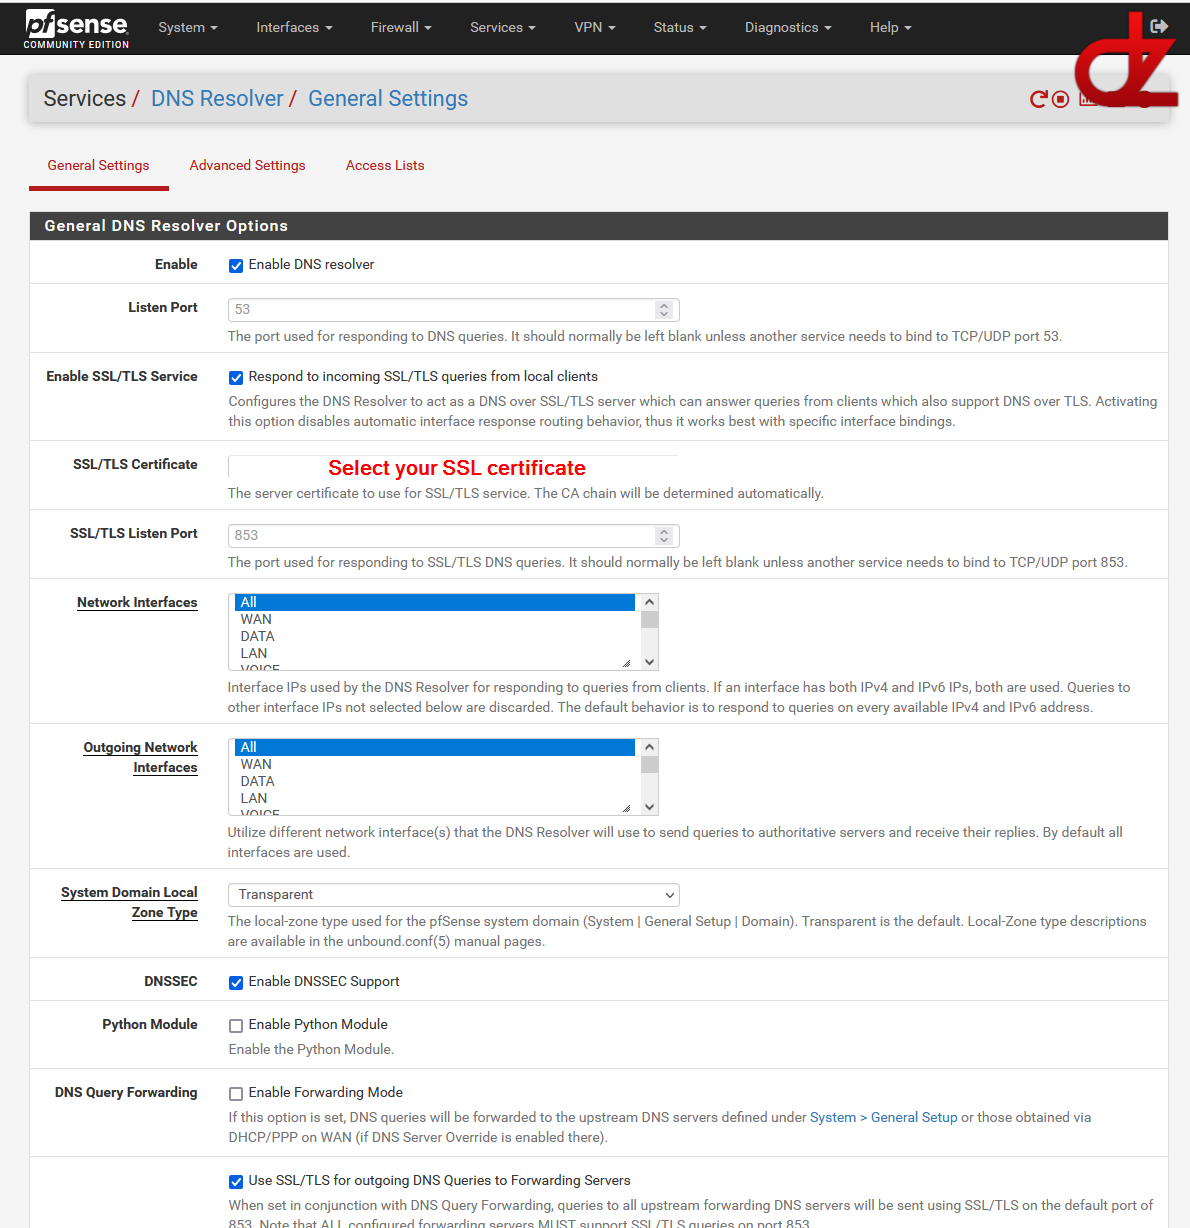
Configure the DNS resolver
- Enable the DNS Resolver if its not yet enabled
- Enable the “SSL/TLS Service”
- Select your “SSL/TLS” certificate

- The SSL/TLS listen port may be left to default
- Enable “DNSSEC” support
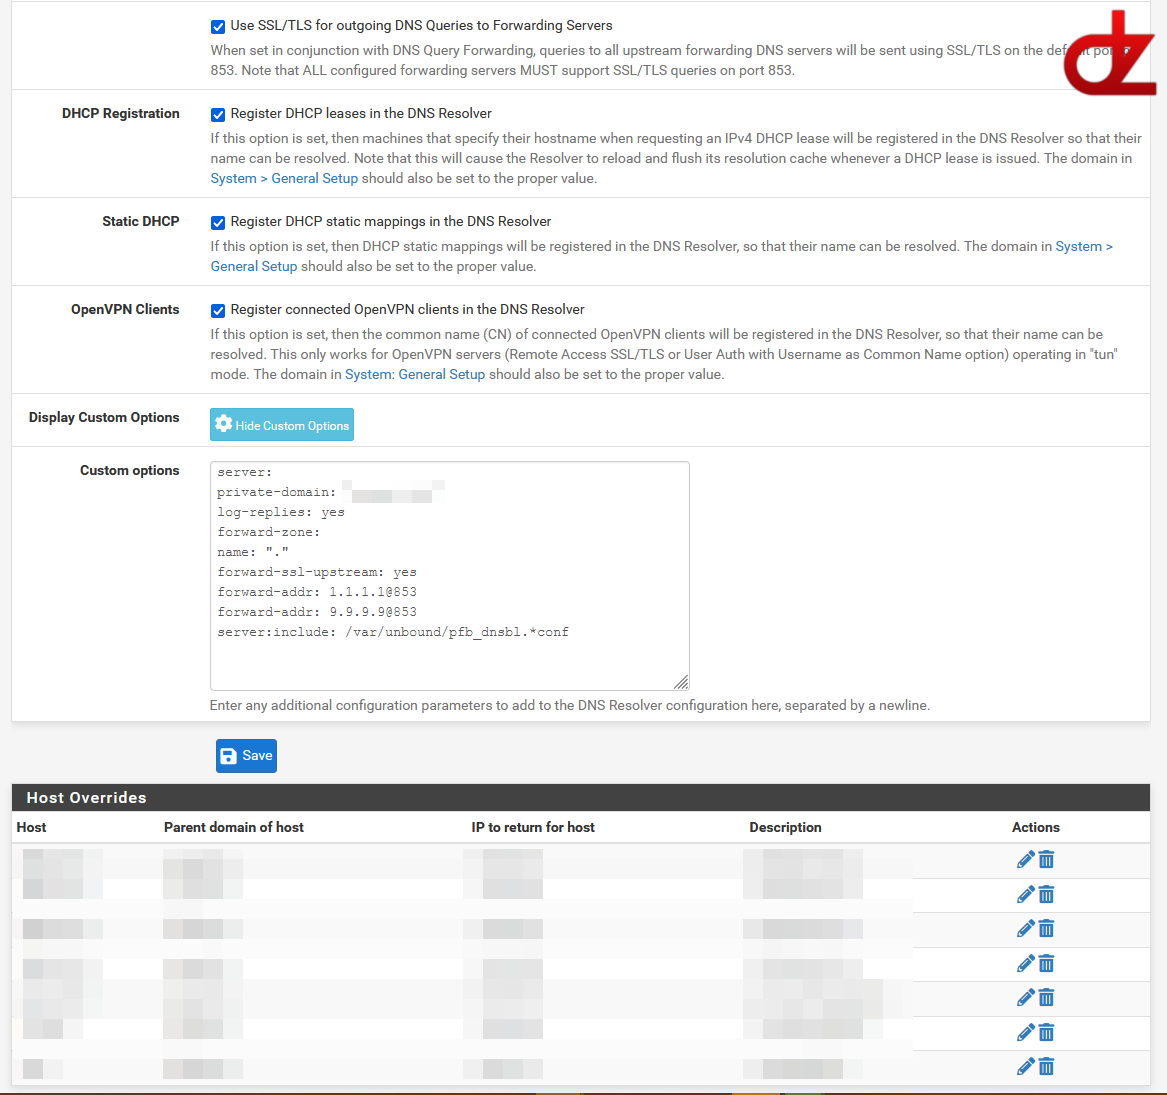
- Enable the optional “Use SSL/TLS for outgoing DNS Queries to Forwarding Servers”
- Important: Set the custom options
server:
private-domain: "mydomain.local"
log-replies: yes
forward-zone:
name: "."
forward-ssl-upstream: yes
forward-addr: 1.1.1.1@853
forward-addr: 9.9.9.9@853
server:include: /var/unbound/pfb_dnsbl.*conf - If needed set your host and domain overrides. e.g. for my setup these are set to my AD/ DNS servers and some other important servers

- Do not forget to save your changes
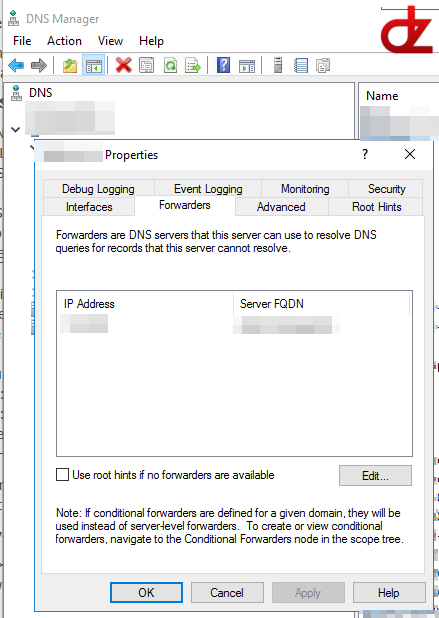
Windows AD server DNS settings
- Go to DNS -> your AD server-> Properties and go to the forwarders tab
- Set your forwarder to your pfSense firewall(s) IP or FQDN address

Testing your DNSSEC
- DNS: simple DNS queries will show that you are still using your AD DNS server for your clients, while your AD DNS server forwards the DNS requests to your pfSense firewall(s) and again externally to the public DNS servers (e.g. 1.1.1.1 and 9.9.9.9)
- DNSSEC: A quick and easy test is the “DNSSEC Resolver Test” from uni-due.de


